Setting up your workspace
The five-step setup a new workspace runs once — name and URL, country and currency, your role, and a starting template.
What it is
Onboarding runs once, immediately after a new account's email is verified. It names the workspace, decides where it operates, records what you do, and picks a starting template. Two of the five answers are difficult to change afterwards, which is why the wizard exists rather than a settings page.
How to get there
You are sent to /onboarding automatically after verifying your email at sign-up. Signing in without a session sends you to /login instead; a signed-in account with no handle or no workspace is redirected back here.
Your workspace already exists by the time you arrive — creating the account created it, named <First name>'s Workspace, with you as its Admin on the Free plan. Onboarding edits it rather than making it.
How to use it
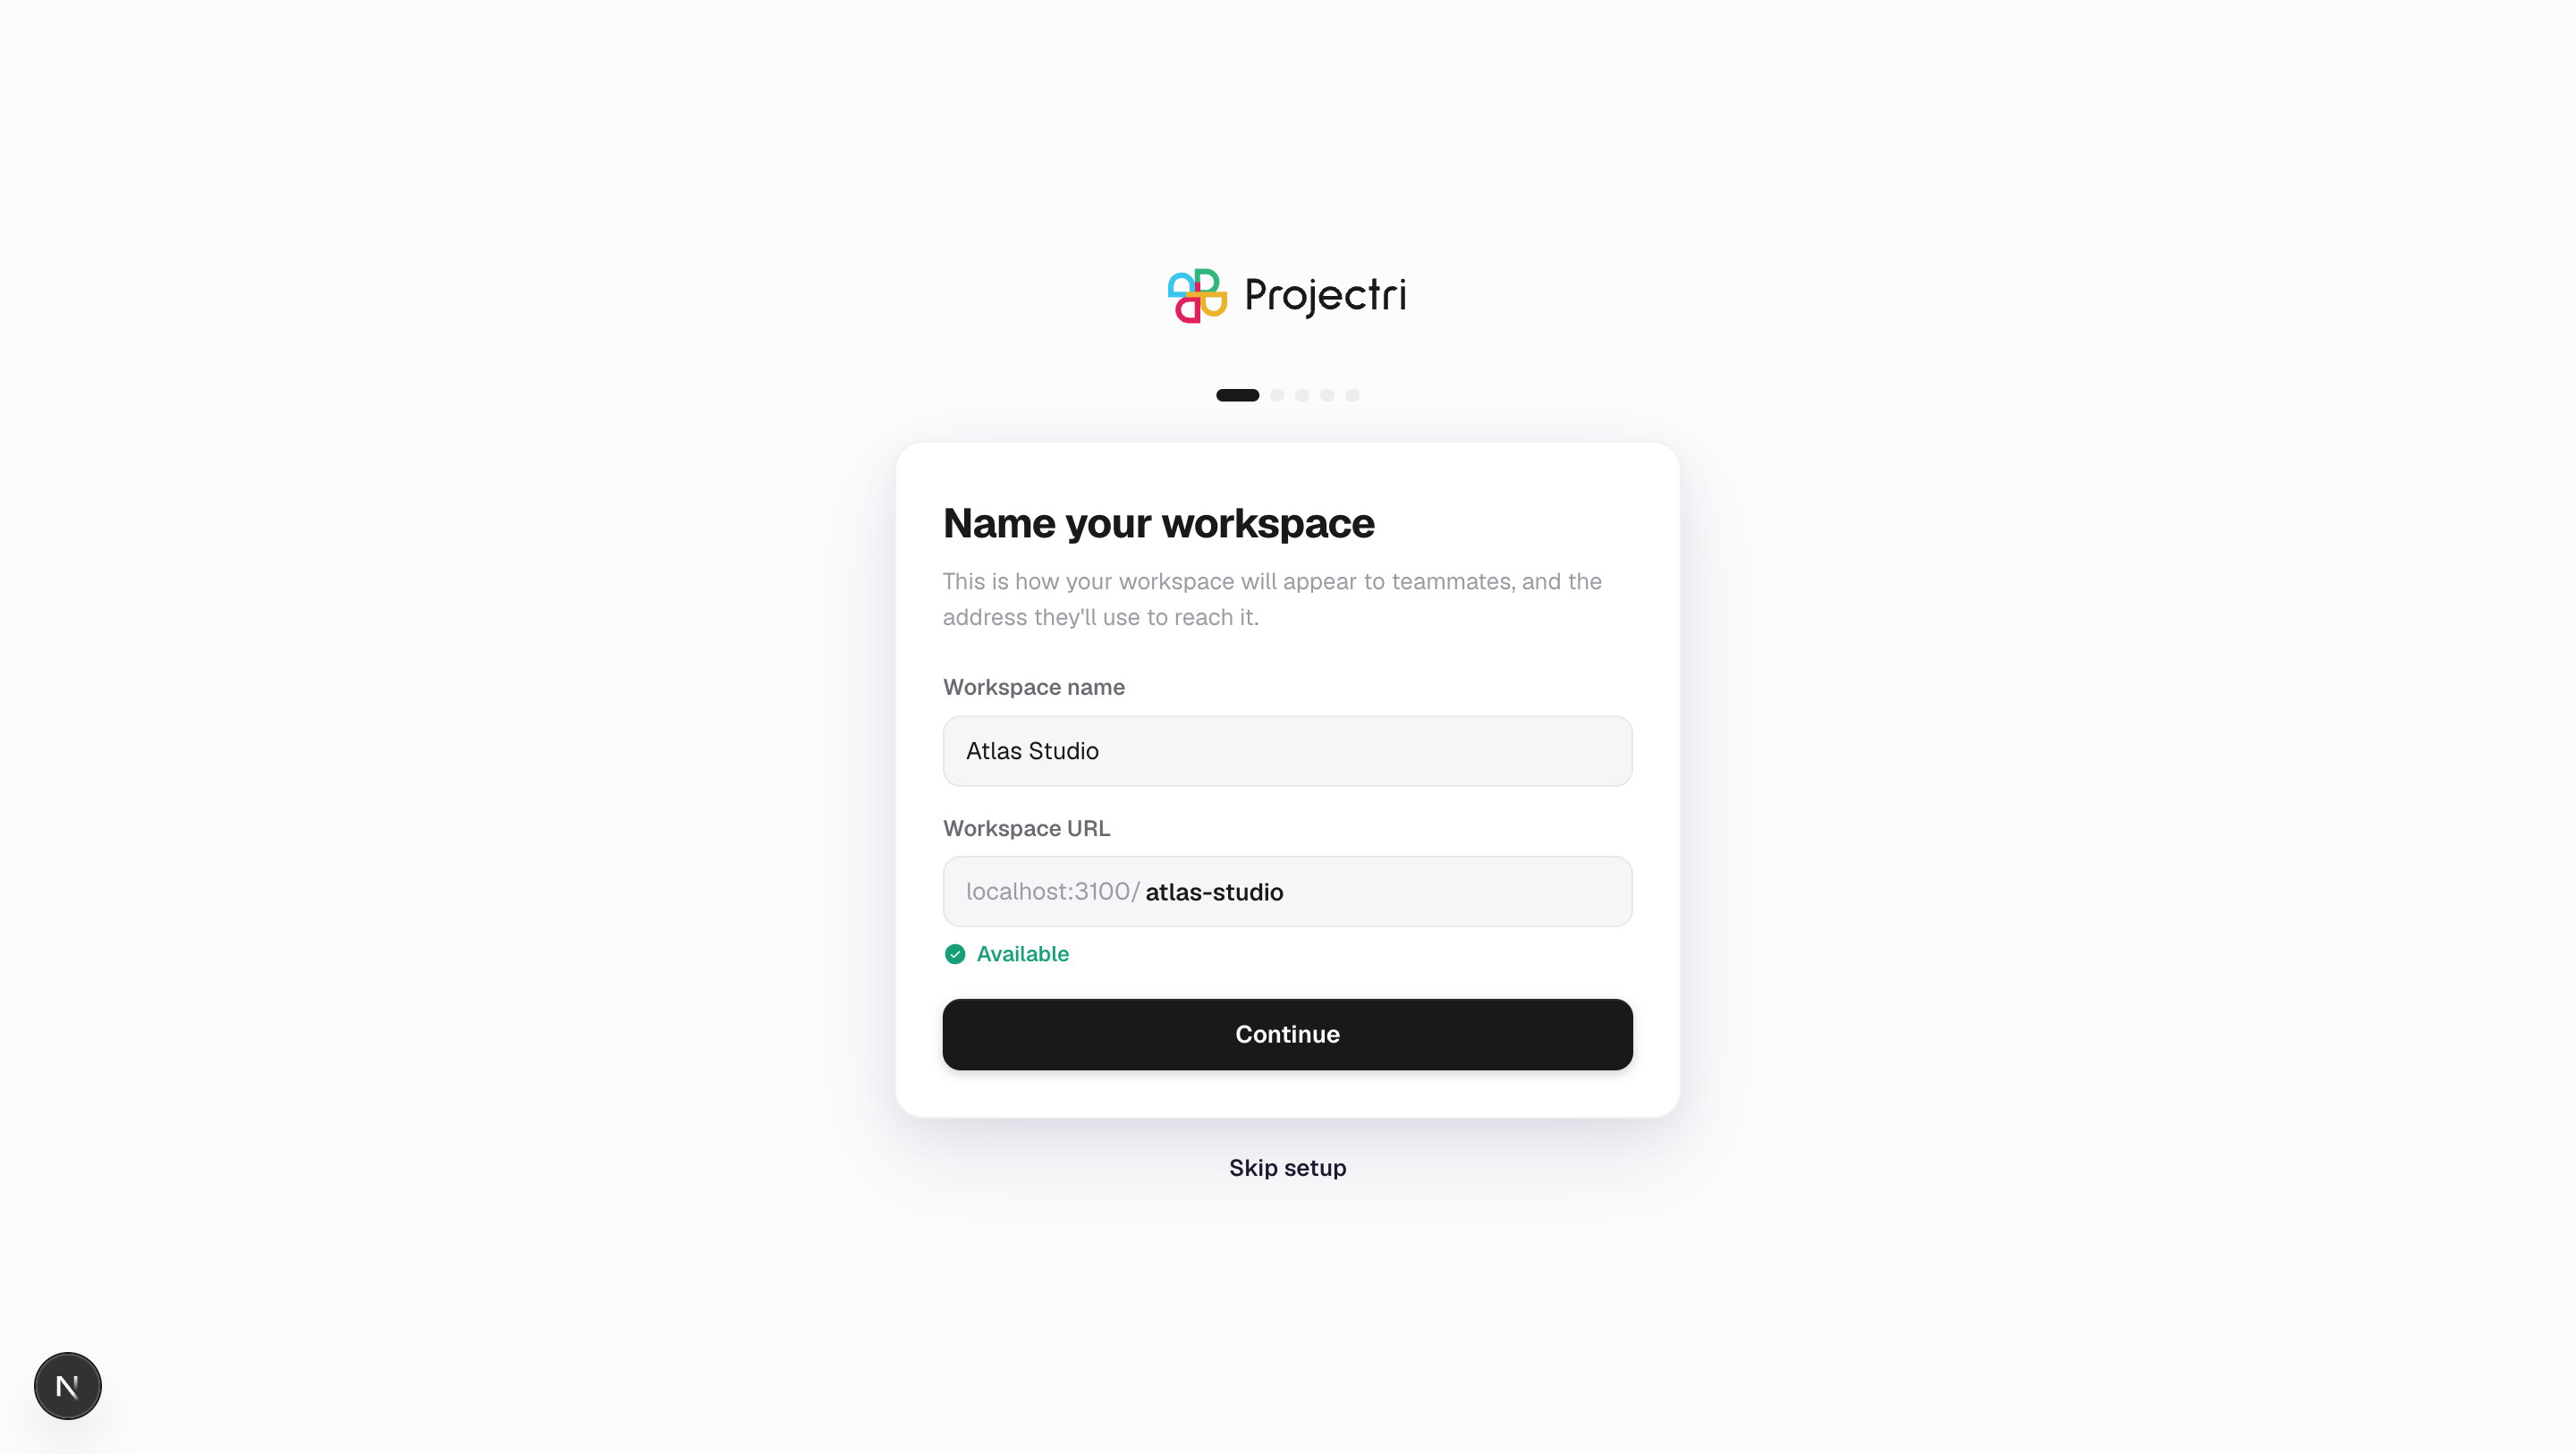
Step 1 — Name the workspace and pick its URL
- Type the workspace name. The URL underneath follows it automatically until you edit the URL by hand, after which it stops tracking.
- The line under the field says Checking availability…, then Available or the reason it cannot be used.
- Press Continue. The server re-validates and can still reject what the field accepted; whatever it settles on is the URL you get.
Step 2 — Where do you operate
- Pick a country. The list is grouped by region, and the search box matches the region name as well as the country — typing "Gulf" narrows to it.
- The reporting currency is filled in from the country and can be overridden; a UK firm reporting in USD is ordinary. Once you change it by hand it stops following the country.
- The panel underneath shows the three values the country also decides: timezone, date format and working week.
- Press Continue.
Step 3 — Tell us about yourself
- Enter a job title.
- Pick one of Engineering, Design, Marketing, Operations or Other.
- Press Continue. A failure here is not surfaced — this step is a preference, not a commitment.
Step 4 — Choose a template
Pick one of five starting points and press Use this template. Each tile shows its name, a description and a sample of the tasks it would create.
Step 5 — Done
You are taken to your workspace after a moment, or immediately with Go to workspace.
Skip setup is in the footer of every step and takes you straight to the workspace.
What it affects
- The workspace URL becomes the first segment of every link anyone shares. It can only be changed while you are still the only member; once a teammate joins, the change is refused, because there is no redirect from the old address.
- The country provisions the working week, and the finance engine divides by it. A Gulf workspace left on Monday to Friday has every utilisation and capacity figure in the tenant wrong by a day a week. It also sets the timezone and the date format used across the product.
- The reporting currency is what every financial total is expressed in. It is effectively permanent once any money has been recorded, so a rejected save on step 2 stops the wizard rather than being swallowed.
- The job title appears on your profile and in the member directory.
- Country, currency, timezone and working week are all editable afterwards in the admin console; the URL, in practice, is not.
On mobile
This screen is web only. New workspaces are created in a browser; the phone app signs in to one that already exists.
Limits and gotchas
- The template choice is stored in this browser, not on the server. It decides what the workspace looks like on the way in; opening the workspace in a different browser does not carry it across.
- The country pre-selected on step 2 is guessed from where the request came from, which a VPN makes confidently wrong. It is a default and nothing more — check it.
- Skipping setup leaves the workspace named
<First name>'s Workspaceon a URL derived from your first name, with the locale that was guessed at sign-up. All of it is fixable in the admin console except the URL. - The reporting currency shown on step 2 only applies if you press Continue on that step. Skipping past it keeps whatever was provisioned at sign-up.
Related
- Signing in — creating the account that gets you here.
- Your first week — what to do once the workspace exists.
- Workspace settings — changing locale, working days and branding later.
- Company — the workspace's own record.